Aller au contenu


Contenu de Gamepigeek

Il y a 52 élément(s) pour Gamepigeek (recherche limitée depuis 05-mai 13)


#113485 Vigibot Pi arduino Serial Communication Example

Posté par Gamepigeek sur 05 mai 2021 - 01:15 dans Vigibot

Hello everyone ! 


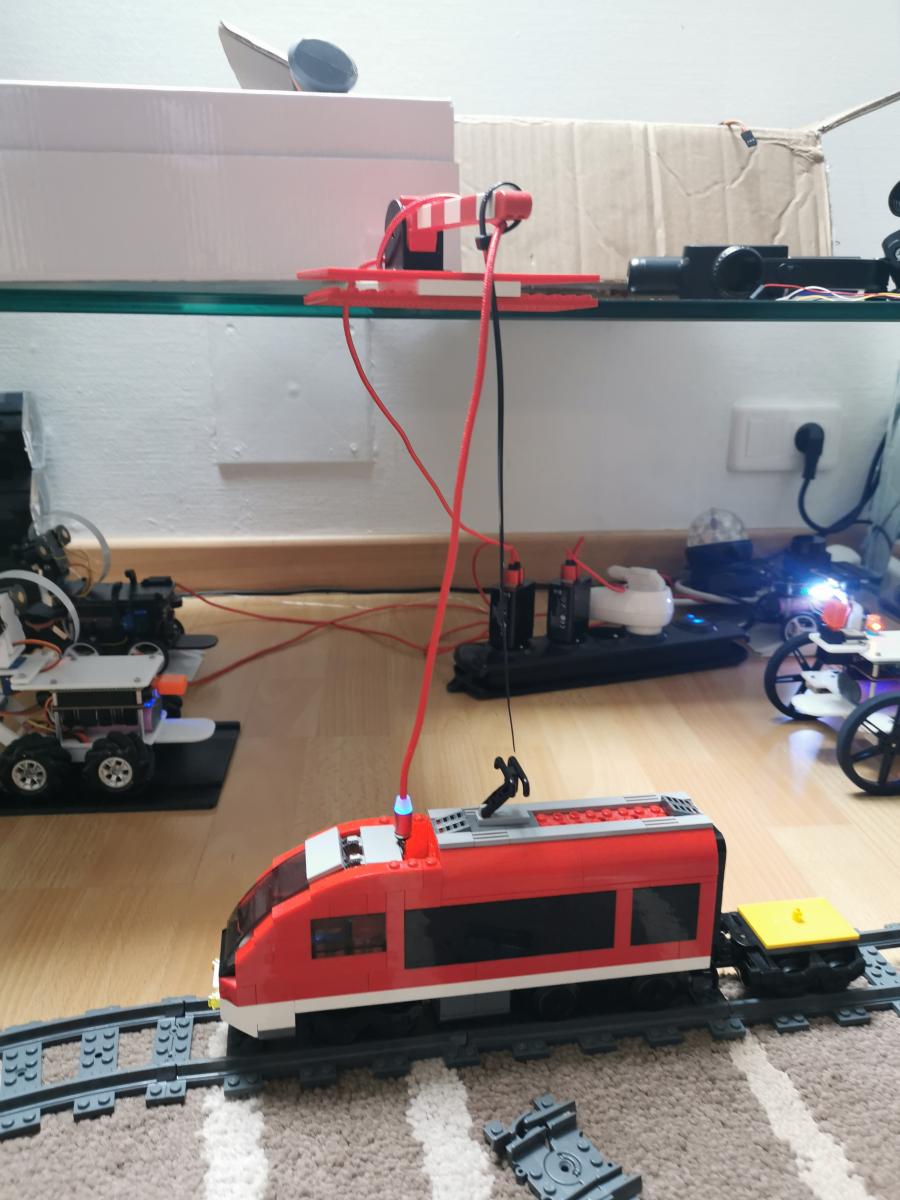
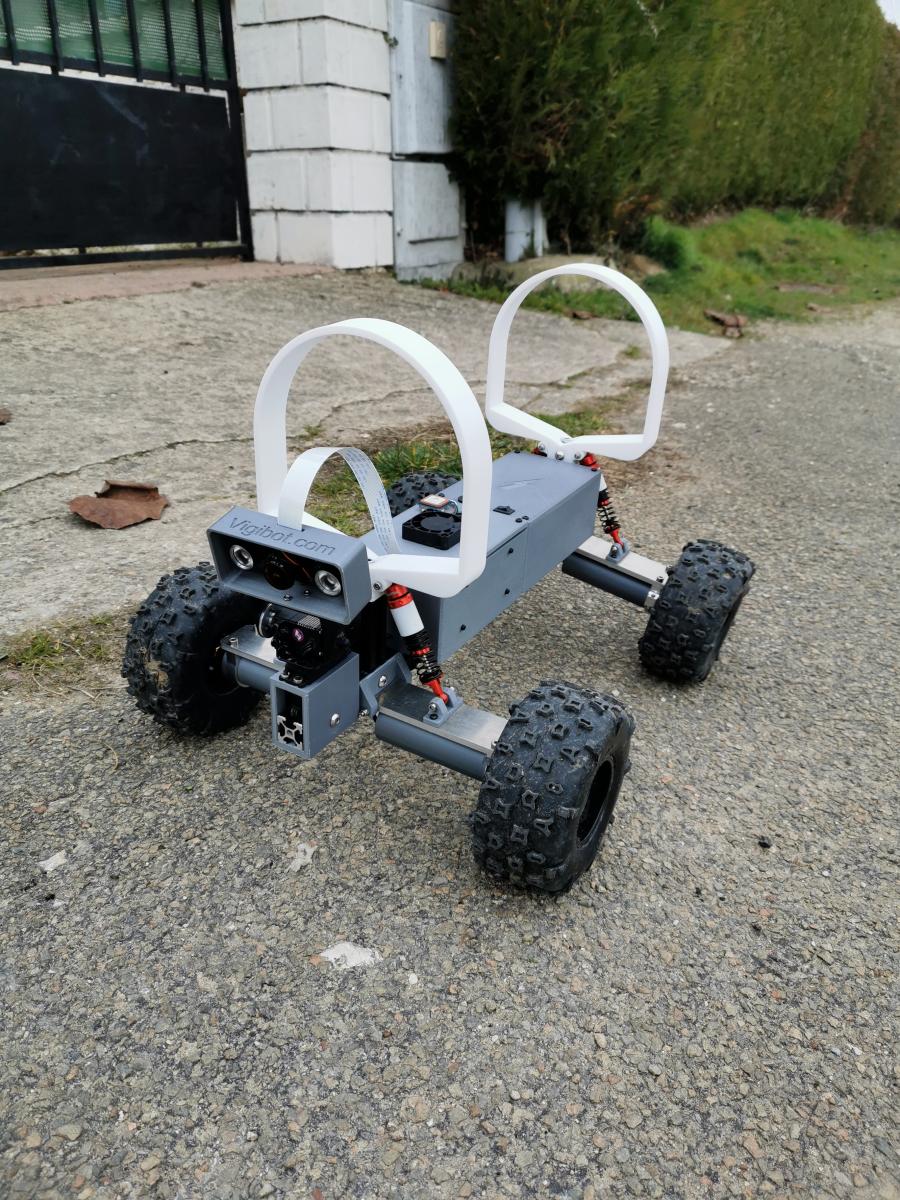
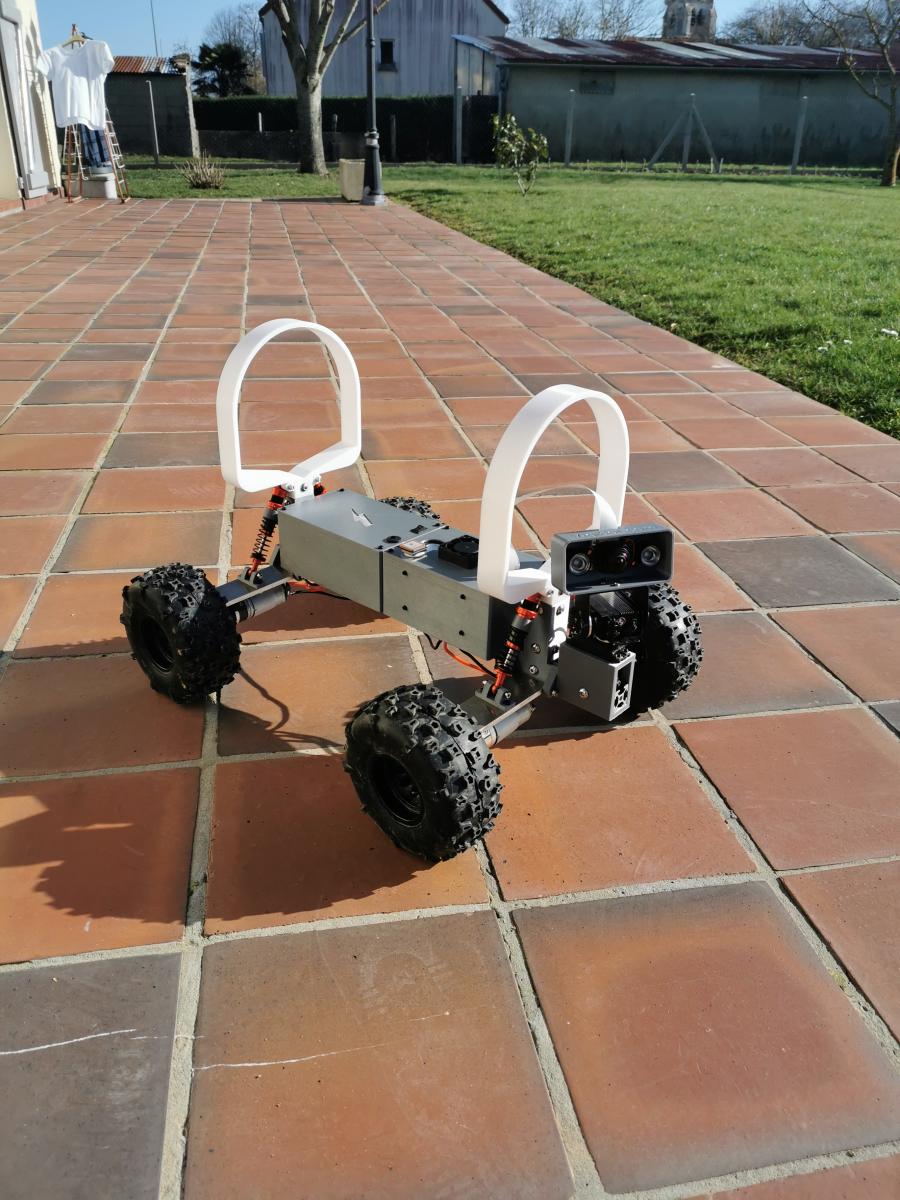
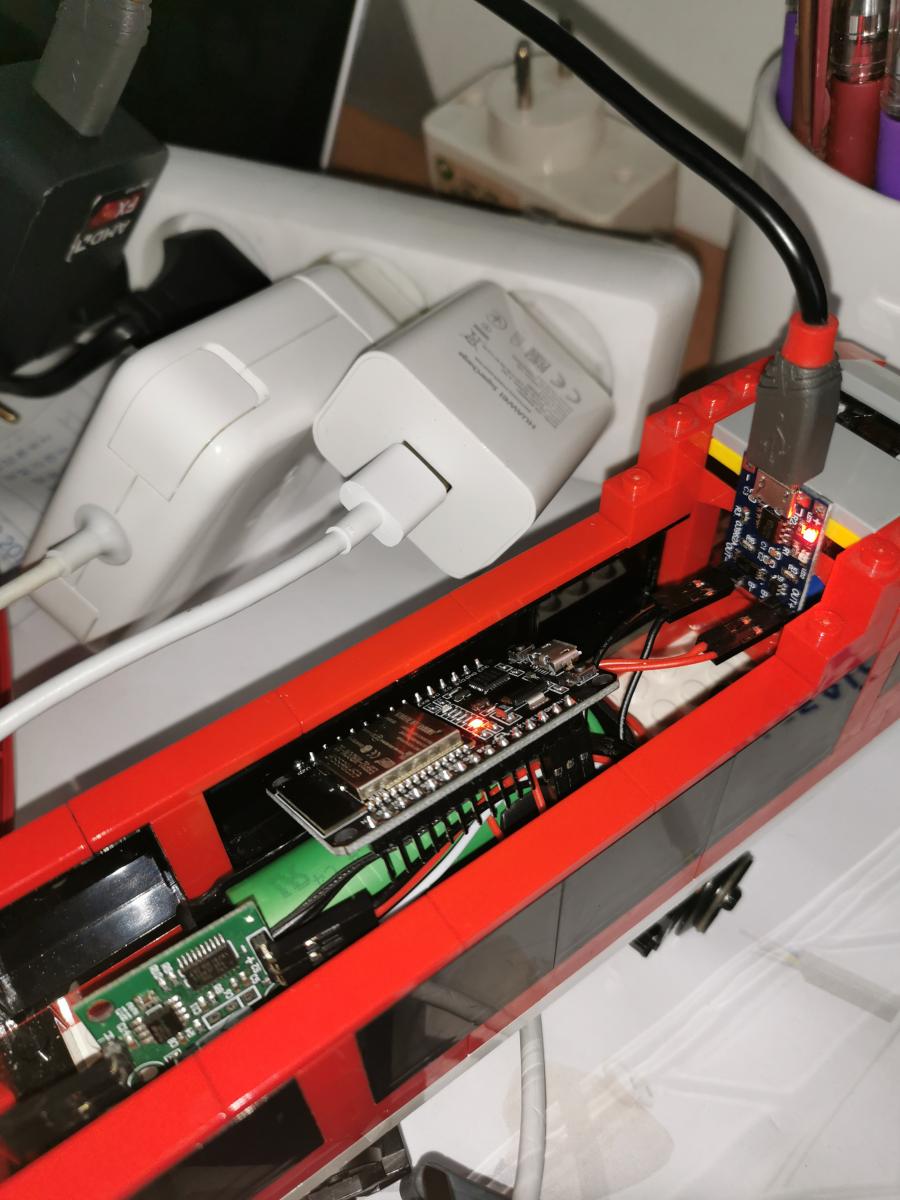
Je vais Vigiboter mon train légo. Pour ce faire, j'utilise un ESP32. 


J'ai donc repris le code d'exemple de @Mike118 que j'ai adapté :


#include <WiFi.h>
#include <ESPmDNS.h>
#include "esp32-hal-ledc.h"

const char* ssid = "ssid";
const char* pass = "mdp";
// Set your Static IP address
IPAddress local_IP(192, 168, 0, 61);
// Set your Gateway IP address
IPAddress gateway(192, 168, 0, 254);
IPAddress subnet(255, 255, 255, 0);


// Meta Type :

typedef struct {
  union {
    struct {
      int16_t x;
      int16_t y;
    };
    int16_t coordonnees[2];
    uint8_t bytes[4];
  };
} Point;

typedef struct {
  union {
    struct {
      int8_t x;
      int8_t y;
      int8_t z;
    };
    uint8_t bytes[3];
  };
} Vitesses;


// CONFIG

//#define PISERIAL Serial
#define NBPOSITIONS 2
#define FAILSAFE 250 // ms

#define MAX_SPEED              1275 // max motor speed
#define SPEED_RANGE            256 //


// TTS

#define TTSBUFFERSIZE 255
uint8_t ttsBuffer[TTSBUFFERSIZE];
uint8_t ttsCurseur = 0;


// TX

#define TXFRAMESIZE (NBPOSITIONS * 4 + 17)

typedef struct {
  union {
    struct {
      uint8_t sync[4];               // 4
      Point positions[NBPOSITIONS];  // NBPOSITIONS * 4
      uint16_t val16[2];             // 2 * 2
      uint8_t choixCameras;          // 1
      Vitesses vitesses;             // 3
      uint8_t interrupteurs;         // 1
      uint8_t val8[4];               // 4
    };

    uint8_t bytes[TXFRAMESIZE];
  };
} TrameTx;

// RX

#define RXFRAMESIZE (NBPOSITIONS * 4 + 9)

typedef struct {
  union {
    struct {                       // Sizes
      uint8_t sync[4];              // 4
      Point positions[NBPOSITIONS]; // NBPOSITIONS * 4      
      uint8_t choixCameras;         // 1
      Vitesses vitesses;            // 3
      uint8_t interrupteurs;        // 1
    };

    uint8_t bytes[RXFRAMESIZE];
  };
} TrameRx;


TrameTx trameTx;
TrameRx trameRx;

uint32_t lastTrameTimestamp = millis();
uint32_t lastSleepBeacon;

WiFiServer server(7070);  //ESP server port
WiFiClient client;

void setup()
{
  Serial.begin(115200);
  ledcSetup(1, 50, 16); // channel 1, 50 Hz, 16-bit width
  ledcAttachPin(13, 1);   // GPIO 13 assigned to channel 1


  // We start by connecting to a WiFi network

  Serial.print("Connecting to ");
  Serial.println(ssid);

  WiFi.mode(WIFI_STA);
  WiFi.config(local_IP, gateway, subnet);
  WiFi.setHostname("Vigibot_ESP_0");
  WiFi.begin(ssid, pass);
  while (WiFi.waitForConnectResult() != WL_CONNECTED) {
    Serial.println("Connection Failed! Rebooting...");    delay(5000);
    ESP.restart();
  }

  server.begin();

  Serial.println("WiFi connected.");
  Serial.println("IP address: ");
  Serial.println(WiFi.localIP());


  // add all your init here
}

void loop() {
  while (WiFi.waitForConnectResult() != WL_CONNECTED) {
    Serial.println("WLAN Connection Failed! reconnecting...");
    WiFi.mode(WIFI_STA);
    WiFi.begin(ssid, pass);
    delay(10000);
  }

  if (readPiSerial()) {
    // each time we receive a full trame run repeatedly:
    // use values inside trameRx to tell your robot how to move ...
    // trameRx.vitesses.x , trameRx.vitesses.y, trameRx.vitesses.z
    // trameRx.positions[i].x trameRx.positions[i].y  etc....


    writePiSerial();
    lastTrameTimestamp = millis();
  }
  if ( millis() - lastTrameTimestamp > FAILSAFE ) {
    if ((millis() - lastSleepBeacon > 10000) ) { // every 10 seconds
      writePiSerial();                        // Beacon to say that the robot is alive
      lastSleepBeacon = millis();
    }
    // Stop the robot in case the robot lost connection with the Pi
    ledcWrite(1, 0); //stop the train

  } else {
    // put your main code here, to run repeatedly:
    // avoid abstacle, run speed ...
    
    int speed;
    
    // mixage pour obtenir les vitesses moteurs
    speed = (trameRx.vitesses.y * MAX_SPEED / SPEED_RANGE) - (trameRx.vitesses.z * MAX_SPEED / SPEED_RANGE);


    // Saturation des vitesse
    speed = min(max(speed, -MAX_SPEED), MAX_SPEED);

    ledcWrite(1, speed);
    
  }
  
}


bool readPiSerial() {
  uint8_t current;
  static uint8_t lastType = 0;
  static uint8_t n = 0;
  static uint8_t frame[RXFRAMESIZE];
  static byte lastClientState = 0;
  if (client.connected()) {
    if (!lastClientState) {
      lastClientState = 1;
      Serial.println("New Client.");
    }
    while (client.available()) {
      current = client.read();
      //Serial.write(current); //debug

      switch (n) {

        case 0:
          if (current == '$')
            n = 1;
          break;

        case 1:
          if (current != 'T' && lastType == 'T')
            writeTtsBuffer('\n');

          if (current == 'S' || current == 'T') {
            lastType = current;
            n = 2;
          } else
            n = 0;
          break;

        default:
          frame[n++] = current;

          if (n == RXFRAMESIZE) {

            if (lastType == 'T') {

              for (uint8_t i = 4; i < RXFRAMESIZE; i++) // Do not send the 4 sync data in tts
                writeTtsBuffer(frame[i]);

            } else if (lastType == 'S') {

              for (uint8_t p = 0; p < RXFRAMESIZE; p++)
                trameRx.bytes[p] = frame[p];

            }
            n = 0;
            return true;
          }
          //break;
      }
    }
  } else { //if current client is not actively connected anymore, disconnect and wait for new client
    if (lastClientState) {
      lastClientState = 0;
      // close the connection:
      client.stop();
      Serial.println("Client Disconnected.");
    }
    client = server.available();   // listen for incoming clients
  }
  return false;
}

void writePiSerial() {
  // Header, do not modify
  trameTx.sync[0] = '$';
  trameTx.sync[1] = 'R';
  trameTx.sync[2] = ' ';
  trameTx.sync[3] = ' ';

  // modify the feedback according your need. By default we copy the trameRx content ...
  for (uint8_t i = 0; i < NBPOSITIONS; i++) {
    trameTx.positions[i].x = trameRx.positions[i].x;
    trameTx.positions[i].y = trameRx.positions[i].y;
  }
  trameTx.val16[0] = 0;   // Voltage (will be updated by Raspberry pi)
  trameTx.val16[1] = 0;   // Percent (will be updated by Raspberry pi)
  trameTx.choixCameras = trameRx.choixCameras;
  trameTx.vitesses.x = trameRx.vitesses.x;
  trameTx.vitesses.y = trameRx.vitesses.y;
  trameTx.vitesses.z = trameRx.vitesses.z;
  trameTx.interrupteurs = trameRx.interrupteurs;
  trameTx.val8[0] = 0;   // CPU load (will be updated by Raspberry pi)
  trameTx.val8[1] = 0;   // Soc temp (will be updated by Raspberry pi)
  trameTx.val8[2] = 0;   // link (will be updated by Raspberry pi)
  trameTx.val8[3] = 0;   // RSSI (will be updated by Raspberry pi)

  for ( uint8_t i = 0; i < TXFRAMESIZE; i++)
    client.write(trameTx.bytes[i]);
}

void displayTtsBuffer (uint8_t * ttsBuffer, uint8_t bufferSize) {
  // you can modify this function to display text on a screen depending on your hardware...
  for ( uint8_t i = 0; i < bufferSize; i++) {
    Serial.write(ttsBuffer[i]);
  }
  Serial.println("");
}

void writeTtsBuffer( uint8_t ttsChar) {
  static uint8_t ttsCurseur = 0;
  if ( ttsCurseur < TTSBUFFERSIZE && ttsChar != '\n') {
    ttsBuffer[ttsCurseur] = ttsChar;
    ttsCurseur ++;
  }
  if ( ttsCurseur == TTSBUFFERSIZE || ttsChar == '\n') {
    displayTtsBuffer (ttsBuffer, ttsCurseur);
    ttsCurseur = 0;
  }
}

Ca fonctionne parfaitement sauf que quand j'accélère sur Vigibot ca n'avance pas comme je veux vu que les math n'ont pas été faites.


Je parle de :

#define MAX_SPEED              1275 // max motor speed
#define SPEED_RANGE            256 //

ou/et de :

ledcSetup(1, 50, 16); // channel 1, 50 Hz, 16-bit width

en sachant que vigibot envoi les consignes moteurs en 8 bit .. 


Je n'ai pas encore le niveau pour améliorer comme je veux ce genre de réglage PWM Hertz etc..


Le calcul reste le meme que pour Zumo.


Merci de votre aide !


Pierre


#113509 Vigibot Pi arduino Serial Communication Example

Posté par Gamepigeek sur 07 mai 2021 - 10:25 dans Vigibot

Hello,


I finished my code with the help of Mike118 and Firened ! Thank you so much


#include <WiFi.h>
#include <ESPmDNS.h>

int pwmChannel = 0; //Choisit le canal 0
int frequence = 50; //Fréquence PWM de 5 KHz
int resolution = 16; //Résolution de 16 bits, 65535 valeurs possibles
int pwmPin = 13;
int MaxRev = 8192;// duty cycle pour avancer fond
int MaxFor = 1638;// duty cycle pour reculer a fond


const char* ssid = "My Wifi";
const char* pass = "My Pass";
// Set your Static IP address
IPAddress local_IP(192, 168, 0, 61);
// Set your Gateway IP address
IPAddress gateway(192, 168, 0, 254);
IPAddress subnet(255, 255, 255, 0);


// Meta Type :

typedef struct {
  union {
    struct {
      int16_t x;
      int16_t y;
    };
    int16_t coordonnees[2];
    uint8_t bytes[4];
  };
} Point;

typedef struct {
  union {
    struct {
      int8_t x;
      int8_t y;
      int8_t z;
    };
    uint8_t bytes[3];
  };
} Vitesses;


// CONFIG

//#define PISERIAL Serial
#define NBPOSITIONS 2
#define FAILSAFE 250 // ms

// TTS

#define TTSBUFFERSIZE 255
uint8_t ttsBuffer[TTSBUFFERSIZE];
uint8_t ttsCurseur = 0;


// TX

#define TXFRAMESIZE (NBPOSITIONS * 4 + 17)

typedef struct {
  union {
    struct {
      uint8_t sync[4];               // 4
      Point positions[NBPOSITIONS];  // NBPOSITIONS * 4
      uint16_t val16[2];             // 2 * 2
      uint8_t choixCameras;          // 1
      Vitesses vitesses;             // 3
      uint8_t interrupteurs;         // 1
      uint8_t val8[4];               // 4
    };

    uint8_t bytes[TXFRAMESIZE];
  };
} TrameTx;

// RX

#define RXFRAMESIZE (NBPOSITIONS * 4 + 9)

typedef struct {
  union {
    struct {                       // Sizes
      uint8_t sync[4];              // 4
      Point positions[NBPOSITIONS]; // NBPOSITIONS * 4      
      uint8_t choixCameras;         // 1
      Vitesses vitesses;            // 3
      uint8_t interrupteurs;        // 1
    };

    uint8_t bytes[RXFRAMESIZE];
  };
} TrameRx;


TrameTx trameTx;
TrameRx trameRx;

uint32_t lastTrameTimestamp = millis();
uint32_t lastSleepBeacon;

WiFiServer server(7070);  //ESP server port
WiFiClient client;

void setup()
{
  Serial.begin(115200);
  
  ledcSetup(pwmChannel, frequence, resolution);
  ledcAttachPin(pwmPin, pwmChannel);
  // We start by connecting to a WiFi network

  Serial.print("Connecting to ");
  Serial.println(ssid);

  WiFi.mode(WIFI_STA);
  WiFi.config(local_IP, gateway, subnet);
  WiFi.setHostname("Vigibot_ESP_0");
  WiFi.begin(ssid, pass);
  while (WiFi.waitForConnectResult() != WL_CONNECTED) {
    Serial.println("Connection Failed! Rebooting...");    delay(5000);
    ESP.restart();
  }

  server.begin();

  Serial.println("WiFi connected.");
  Serial.println("IP address: ");
  Serial.println(WiFi.localIP());


  // add all your init here
}

void loop() {
  while (WiFi.waitForConnectResult() != WL_CONNECTED) {
    Serial.println("WLAN Connection Failed! reconnecting...");
    WiFi.mode(WIFI_STA);
    WiFi.begin(ssid, pass);
    delay(10000);
  }

  if (readPiSerial()) {
    // each time we receive a full trame run repeatedly:
    // use values inside trameRx to tell your robot how to move ...
    // trameRx.vitesses.x , trameRx.vitesses.y, trameRx.vitesses.z
    // trameRx.positions[i].x trameRx.positions[i].y  etc....


    writePiSerial();
    lastTrameTimestamp = millis();
  }
  if ( millis() - lastTrameTimestamp > FAILSAFE ) {
    if ((millis() - lastSleepBeacon > 10000) ) { // every 10 seconds
      writePiSerial();                        // Beacon to say that the robot is alive
      lastSleepBeacon = millis();
    }
    // Stop the robot in case the robot lost connection with the Pi
    ledcWrite(pwmChannel, 0); //stop the train

  } else {
    // put your main code here, to run repeatedly:
    // avoid abstacle, run speed ...
    
    // mixage pour obtenir les vitesses moteurs
    int speed = map(trameRx.vitesses.y, -128, 128, MaxFor, MaxRev); // 128 recu par vigibot
    
    ledcWrite(pwmChannel, speed); //envoyer la consigne vitesse au moteur via la lib
    
  }
  
}


bool readPiSerial() {
  uint8_t current;
  static uint8_t lastType = 0;
  static uint8_t n = 0;
  static uint8_t frame[RXFRAMESIZE];
  static byte lastClientState = 0;
  if (client.connected()) {
    if (!lastClientState) {
      lastClientState = 1;
      Serial.println("New Client.");
    }
    while (client.available()) {
      current = client.read();
      //Serial.write(current); //debug

      switch (n) {

        case 0:
          if (current == '$')
            n = 1;
          break;

        case 1:
          if (current != 'T' && lastType == 'T')
            writeTtsBuffer('\n');

          if (current == 'S' || current == 'T') {
            lastType = current;
            n = 2;
          } else
            n = 0;
          break;

        default:
          frame[n++] = current;

          if (n == RXFRAMESIZE) {

            if (lastType == 'T') {

              for (uint8_t i = 4; i < RXFRAMESIZE; i++) // Do not send the 4 sync data in tts
                writeTtsBuffer(frame[i]);

            } else if (lastType == 'S') {

              for (uint8_t p = 0; p < RXFRAMESIZE; p++)
                trameRx.bytes[p] = frame[p];

            }
            n = 0;
            return true;
          }
          //break;
      }
    }
  } else { //if current client is not actively connected anymore, disconnect and wait for new client
    if (lastClientState) {
      lastClientState = 0;
      // close the connection:
      client.stop();
      Serial.println("Client Disconnected.");
    }
    client = server.available();   // listen for incoming clients
  }
  return false;
}

void writePiSerial() {
  // Header, do not modify
  trameTx.sync[0] = '$';
  trameTx.sync[1] = 'R';
  trameTx.sync[2] = ' ';
  trameTx.sync[3] = ' ';

  // modify the feedback according your need. By default we copy the trameRx content ...
  for (uint8_t i = 0; i < NBPOSITIONS; i++) {
    trameTx.positions[i].x = trameRx.positions[i].x;
    trameTx.positions[i].y = trameRx.positions[i].y;
  }
  trameTx.val16[0] = 0;   // Voltage (will be updated by Raspberry pi)
  trameTx.val16[1] = 0;   // Percent (will be updated by Raspberry pi)
  trameTx.choixCameras = trameRx.choixCameras;
  trameTx.vitesses.x = trameRx.vitesses.x;
  trameTx.vitesses.y = trameRx.vitesses.y;
  trameTx.vitesses.z = trameRx.vitesses.z;
  trameTx.interrupteurs = trameRx.interrupteurs;
  trameTx.val8[0] = 0;   // CPU load (will be updated by Raspberry pi)
  trameTx.val8[1] = 0;   // Soc temp (will be updated by Raspberry pi)
  trameTx.val8[2] = 0;   // link (will be updated by Raspberry pi)
  trameTx.val8[3] = 0;   // RSSI (will be updated by Raspberry pi)

  for ( uint8_t i = 0; i < TXFRAMESIZE; i++)
    client.write(trameTx.bytes[i]);
}

void displayTtsBuffer (uint8_t * ttsBuffer, uint8_t bufferSize) {
  // you can modify this function to display text on a screen depending on your hardware...
  for ( uint8_t i = 0; i < bufferSize; i++) {
    Serial.write(ttsBuffer[i]);
  }
  Serial.println("");
}

void writeTtsBuffer( uint8_t ttsChar) {
  static uint8_t ttsCurseur = 0;
  if ( ttsCurseur < TTSBUFFERSIZE && ttsChar != '\n') {
    ttsBuffer[ttsCurseur] = ttsChar;
    ttsCurseur ++;
  }
  if ( ttsCurseur == TTSBUFFERSIZE || ttsChar == '\n') {
    displayTtsBuffer (ttsBuffer, ttsCurseur);
    ttsCurseur = 0;
  }
}


#98055 Projet VigiBot, le robot contrôlé facilement par internet pour tous par Vigir...

Posté par Gamepigeek sur 01 août 2018 - 11:01 dans Assistance à la personne

Je suis curieux.... et c est certainement trop tot pour en parler mais ....

Admettons jai déjà une pi un pan tilt un raspicam

Arduino obligatoire ? Je rachète un châssis mieux et des moteurs avec encodeur ça fait déjà un bon joujou ?


#98065 Projet VigiBot, le robot contrôlé facilement par internet pour tous par Vigir...

Posté par Gamepigeek sur 01 août 2018 - 04:51 dans Assistance à la personne

Ok mais niveau moteur donc par exemple avec un arduino faudra t il fait son propre code pour les commandes moteur ? ou celui ci sera fournie dans le pack parce que je nen vois pas comment faire installer quelque chose sur un arduino sans faire copier coller alors que au niveau web ça aucun problème avec un raspberry.

C est génial d avoir pensé à faire des kits et pas acheter 1 robot déjà fais avec le système intégré car si l on a déjà ce quil faut raspicam raspberry 3 dans mon cas et puis on contrôleur moteur je nen sais plus lequel.

Pour les professionnels comment ça se passe ? J imagine quil pourront commander des pièces à l unité et vous demandez quelque chose de spécial pour leur entreprise exemple interface web modifier ou fonctions différentes .Ce quil serait génial c'est de pouvoir connecté ce robot avec d autres appareils tel que Google home . Ok Google dis au robot de surveiller la salle de bain...


#98657 Projet VigiBot, le robot contrôlé facilement par internet pour tous par Vigir...

Posté par Gamepigeek sur 26 août 2018 - 08:03 dans Assistance à la personne

Bonsoir,


je souhaiterais avoir quelques renseignements concernant mon futur robot.... ;)


Premièrement je souhaiterais installer une base de recharge j'ai donc pensé au système de rechargement par induction ! Oui mais si c'est possible avec quel batterie ? et quel système prendra en charge une recharge par induction avec une batterie adapté ? Merci


#98147 Projet VigiBot, le robot contrôlé facilement par internet pour tous par Vigir...

Posté par Gamepigeek sur 04 août 2018 - 01:04 dans Assistance à la personne

Bonjour, merci Mike pour ta réponse précise

Très intéressant cette phrase "hobbyistes créent des solutions qui peuvent intéresser des clients, on rentrerait en contact avec eux pour éventuellement leur proposer de créer une activité professionnelle permettant ainsi à des hobbyiste d'avoir des compléments de revenus intéressant en réalisant leur passions !"

Au sujet de la localisation donc avec un lidar quel adaptation et comment sil on ne veux pas le votre le RP LIDAR mais un autre lidar à balayage laser ? Deuxièmement comment faire installer au client votre interface pour robot par quel moyens ?

Merci


#98040 Projet VigiBot, le robot contrôlé facilement par internet pour tous par Vigir...

Posté par Gamepigeek sur 31 juillet 2018 - 08:27 dans Assistance à la personne

Hmm... très intéressent je dis oui à une version bêta pour Noël ;) as tu une idée du prix lors de la commercialisation sans en dire de trop :)

En tout cas très beau projet

Merci à vous 2

Cordialement


#113558 Photos

Posté par Gamepigeek sur 15 mai 2021 - 10:41 dans Vigibot

Voici qq photos des miens 😋

Image(s) jointe(s)

  • IMG_20210504_213338.jpg
  • IMG_20210512_115844.jpg
  • IMG_20210504_213401.jpg
  • IMG_20210512_115850.jpg
  • IMG_20210512_115850.jpg
  • IMG_20210502_172136.jpg
  • IMG_20210502_172127.jpg
  • IMG_20210501_171048.jpg
  • IMG_20210513_210125.jpg
  • IMG_20210407_170551.jpg
  • IMG_20210405_190644.jpg
  • IMG_20210511_115149.jpg
  • IMG_20210504_221231.jpg
  • IMG_20210505_220002.jpg
  • IMG_20210509_114244.jpg
  • IMG_20210502_145052.jpg
  • IMG_20210407_233841.jpg
  • IMG_20210405_232015.jpg
  • IMG_20210404_205430.jpg
  • IMG_20210403_202709.jpg
  • IMG_20210321_172422.jpg
  • IMG_20210312_163130.jpg
  • IMG_20210304_155436.jpg
  • IMG_20210305_155937.jpg
  • IMG_20210221_151600.jpg
  • IMG_20210316_183124.jpg
  • IMG_20210511_150830.jpg
  • IMG_20210506_125603.jpg
  • IMG_20210504_221240.jpg
  • IMG_20210430_225706.jpg
  • IMG_20210404_201314.jpg


#110571 Photos

Posté par Gamepigeek sur 20 juillet 2020 - 11:28 dans Vigibot

Bigwheels :

Image(s) jointe(s)

  • WhatsApp Image 2020-07-20 at 11.58.16 (1).jpeg
  • WhatsApp Image 2020-07-20 at 11.58.16 (2).jpeg
  • WhatsApp Image 2020-07-20 at 11.58.16 (3).jpeg
  • WhatsApp Image 2020-07-20 at 11.58.16 (4).jpeg
  • WhatsApp Image 2020-07-20 at 11.58.16.jpeg


#110572 Photos

Posté par Gamepigeek sur 20 juillet 2020 - 11:33 dans Vigibot

Lardon :  

Image(s) jointe(s)

  • WhatsApp Image 2020-07-20 at 12.32.04.jpeg
  • WhatsApp Image 2020-07-20 at 12.32.04 (2).jpeg
  • WhatsApp Image 2020-07-20 at 12.32.04 (1).jpeg


#101452 Nouvelle Bannière

Posté par Gamepigeek sur 12 janvier 2019 - 06:08 dans Les annonces Robot Maker

Superbe idée !


#101441 Nouvelle Bannière

Posté par Gamepigeek sur 12 janvier 2019 - 09:15 dans Les annonces Robot Maker

Tient par contre c'est en JPG :(

Image(s) jointe(s)

  • robotmakeur.jpg


#101387 Nouvelle Bannière

Posté par Gamepigeek sur 10 janvier 2019 - 07:21 dans Les annonces Robot Maker

Voila une petite version toute fraîche pas terminée du tout 


c'est de la bouine...

Image(s) jointe(s)

  • Sans titre-1.png


#101450 Nouvelle Bannière

Posté par Gamepigeek sur 12 janvier 2019 - 02:16 dans Les annonces Robot Maker

Je préfère la mienne PTDR  


#99844 Minus V1.0 Un vigibot simplifié pour Noël en précommande ?

Posté par Gamepigeek sur 05 novembre 2018 - 09:39 dans Archives vigibot

J'ai déjà un Raspberry PI 3, un pan-tilt , et une camera


Pour les moteurs puis-je prendre des 9g 360 continue ? La petite carte de conversion PWM servo en PWM 0 à 100% ou peut on la trouvée ?


Pour le système de charge je vais voir cela avec Mike118 ;) Merci a lui.


#99879 Minus V1.0 Un vigibot simplifié pour Noël en précommande ?

Posté par Gamepigeek sur 06 novembre 2018 - 09:42 dans Archives vigibot

Ça ne répond pas totalement a mes questions :(


#100038 Minus V1.0 Un vigibot simplifié pour Noël en précommande ?

Posté par Gamepigeek sur 11 novembre 2018 - 04:46 dans Archives vigibot

driver-convertisseur-moteur-cc-servomote


a partir de cela j'aimerais avoir un shéma de câblage 


merci


#99875 Minus V1.0 Un vigibot simplifié pour Noël en précommande ?

Posté par Gamepigeek sur 06 novembre 2018 - 07:35 dans Archives vigibot

Je vois que je ne suis pas le seul x) 


J'ai quelques questions:


Si je prend une Lipo 3S quel sera le système de branchement jusque au raspberry ?


J'aimerais avoir le Fichier en 3D de Robil est-ce possible ?


Les moteurs si je prend ceci sans arduino et juste cette petite carte quel est le branchement sur le raspberry, ça se branche juste sur un GPIO 18 par exemple ?


Je souhaiterais être également conseillé sur l'achat d'une pince que pouvez-vous me conseiller ? Peut être impression 3D a voir...


Pour mettre au bout de ces moteurs  y a-t'il une adaptation pour être compatible avec des roues mecanum ?


Quel est le système d’attache moteurs proposé sur le châssis de Robil et puis-je sans modification du châssis mettre les moteur sur celui-ci ?


Merci de vos réponses ;)


#100042 Minus V1.0 Un vigibot simplifié pour Noël en précommande ?

Posté par Gamepigeek sur 11 novembre 2018 - 04:59 dans Archives vigibot

attends les 2 fils blanc vont pas directement aux moteur ? Comment ça il faut les branchés sur le raspberry j'ai pas compris le principe la...


#100344 Minus V1.0 Un vigibot simplifié pour Noël en précommande ?

Posté par Gamepigeek sur 25 novembre 2018 - 11:22 dans Archives vigibot

Pascal :


Avec la qualité vidéo H264 que toi tu as actuellement avec la fibre a Paris  :dash2:

A ton avis , pourrais-je avoir la même qualité vidéo que toi avec ma petite ADSL 1Mpbs d'Upload stable et 8Mpbs de Download ?


:ignat_02: ou  :o ? 


:drag_03:


#100346 Minus V1.0 Un vigibot simplifié pour Noël en précommande ?

Posté par Gamepigeek sur 25 novembre 2018 - 01:14 dans Archives vigibot

Mais mon c'est abusé je comprend pas même si j'utilise ma connexion a mort, j'ai toujours le même débit sur speedtest ! la navigation est fluide et tout c'est bizarre !


#100419 Minus V1.0 Un vigibot simplifié pour Noël en précommande ?

Posté par Gamepigeek sur 28 novembre 2018 - 10:53 dans Archives vigibot

Concernant le BMS pour Lipo 3S


Quel est le schéma de câblage svp ?


Image(s) jointe(s)

  • schema_assemblage_bms.png


#99807 Minus V1.0 Un vigibot simplifié pour Noël en précommande ?

Posté par Gamepigeek sur 04 novembre 2018 - 08:59 dans Archives vigibot

Alors la chapeau...! Pas mal de faire un "minibot" pour un prix plus que raisonnable :)


Petite question :  Sur le grand frère que pascal a confectionné sur une des photos on y voit des piles mais sur la photo suivante le bloc de pile a disparue !


Comment le robot est il alimenté ?


#100045 Minus V1.0 Un vigibot simplifié pour Noël en précommande ?

Posté par Gamepigeek sur 11 novembre 2018 - 05:15 dans Archives vigibot

je me suis aperçu de ma bêtise juste avant que tu réponds tu peux delete...


#100196 Minus V1.0 Un vigibot simplifié pour Noël en précommande ?

Posté par Gamepigeek sur 17 novembre 2018 - 11:44 dans Archives vigibot

Petite question sur vigibot :


quand le robot se met en veille les GPIO du raspberry par exemple se coupent ?


si oui ca serait le top