Très belle histoire raconté en vidéo!
Contenu de Snyp54
Il y a 29 élément(s) pour Snyp54 (recherche limitée depuis 21-juillet 14)
Par type de contenu
Voir pour ce membre
#110776 Wall-E
 Posté par
sur 05 août 2020 - 02:29
dans
Robots roulants, chars à chenilles et autres machines sur roues
Posté par
sur 05 août 2020 - 02:29
dans
Robots roulants, chars à chenilles et autres machines sur roues
#107277 Vigibot Pi arduino Serial Communication Example
Posté par
sur 10 janvier 2020 - 10:14
dans
Vigibot
Hi all,
With Mike118 ( and only Mike118 ^^ ), we have make a code for use FEETECH SCS15 servo to work with Vigibot.
The full code
/*
 * Vigibot Pi to Arduino Uart default remote configuration example by Mike118
 */

#include <SCServo.h>
SCSCL sc;

int uint16toSCS15( uint16_t value ) {
  return (value - 32768)* 512 * 180 / (100 * 32768) + 512;
}

uint8_t servoId[4] {2, 3 , 4, 5};

// Meta Type :

struct Point {
 union {
  struct {
   uint16_t x;
   uint16_t y;
  };
  uint16_t coordonnees[2];
  uint8_t bytes[4];
 };
} ;

struct  Vitesses{
 union {
  struct {
   int8_t x;
   int8_t y;
   int8_t z;
  };
  uint8_t bytes[3];
 };
};


// CONFIG

#define PISERIAL Serial2
#define NBPOSITIONS 2
#define FAILSAFE 200 // ms


// TTS

#define TTSBUFFERSIZE 255
uint8_t ttsBuffer[TTSBUFFERSIZE];
uint8_t ttsCurseur = 0;


// TX

#define TXFRAMESIZE (NBPOSITIONS * 4 + 17)

struct TrameTx {
 union {
  struct {
   uint8_t sync[4];               // 4
   Point positions[NBPOSITIONS];  // NBPOSITIONS * 4
   uint16_t val16[2];             // 2 * 2
   uint8_t choixCameras;          // 1
   Vitesses vitesses;             // 3
   uint8_t interrupteurs;         // 1
   uint8_t val8[4];               // 4
  };

  uint8_t bytes[TXFRAMESIZE];
 };
};


// RX

#define RXFRAMESIZE (NBPOSITIONS* 4 + 9)

struct TrameRx{
 union {
  struct {                        // Sizes
   uint8_t sync[2];               // 4
   Point positions[NBPOSITIONS];  // NBPOSITIONS * 4
   uint8_t choixCameras;          // 1
   Vitesses vitesses;             // 3
   uint8_t interrupteurs;         // 1
  };

  uint8_t bytes[RXFRAMESIZE];
 };
} ;


TrameTx trameTx;
TrameRx trameRx;

uint32_t lastTrameTimestamp = millis();
Point oldPositions[NBPOSITIONS];        // NBPOSITIONS * 4

void setup() {
  PISERIAL.begin(115200);
  // add all your init here
  Serial1.begin(1000000);
  sc.pSerial = &Serial1;
}


void loop() {

  if(readPiSerial()) {
    writePiSerial();
    lastTrameTimestamp = millis();
  }

  if( millis() - lastTrameTimestamp > FAILSAFE ) {
    // Stop the robot in case the robot lost connection with the Pi
  } else {
    // put your main code here, to run repeatedly:
    updateServo();
  }
}

void updateServo() {
  for(uint8_t i = 0; i < NBPOSITIONS; i++) {
    for(uint8_t j = 0; j < 2 ; j++) {
      if(oldPositions[i].coordonnees[j] != trameRx.positions[i].coordonnees[j]) {
        sc.WritePos(servoId[i + j], uint16toSCS15(trameRx.positions[i].coordonnees[j]), 200);
        oldPositions[i].coordonnees[j] = trameRx.positions[i].coordonnees[j];
      }
    }
  }
}

bool readPiSerial() {
 uint8_t current;
 static uint8_t lastType = 0;
 static uint8_t n = 0;
 static uint8_t frame[RXFRAMESIZE];

 while(PISERIAL.available()) {
  current = PISERIAL.read();

  switch(n) {

   case 0:
    if(current == '$')
     n = 1;
    break;

   case 1:
    if(current != 'T' && lastType == 'T')
     writeTtsBuffer('\0');

    if(current == 'S' || current == 'T') {
     lastType = current;
     n = 2;
    } else
     n = 0;
    break;

    default:
    frame[n++] = current;

    if(n == RXFRAMESIZE) {

     if(lastType == 'T') {

      for(uint8_t i = 2; i < RXFRAMESIZE; i++)
       writeTtsBuffer(frame[i]);

     } else if(lastType == 'S') {

      for(uint8_t p = 0; p < RXFRAMESIZE; p++)
       trameRx.bytes[p] = frame[p];

     }
     n = 0;
     return true;
    }

  }
 }

 return false;
}

void writePiSerial() {
 // Header, do not modify
 trameTx.sync[0] = '$';
 trameTx.sync[1] = 'R';
 trameTx.sync[2] = ' ';
 trameTx.sync[3] = ' ';

 // modify the feedback according your need. By default we copy the trameRx content ...
 for(uint8_t i = 0; i < NBPOSITIONS; i++) {
  trameTx.positions[i].x = trameRx.positions[i].x;
  trameTx.positions[i].y = trameRx.positions[i].y;
 }
 trameTx.val16[0] = 0;   // Voltage
 trameTx.val16[1] = 0;   // Percent
 trameTx.choixCameras = trameRx.choixCameras;
 trameTx.vitesses.x = trameRx.vitesses.x;
 trameTx.vitesses.y = trameRx.vitesses.y;
 trameTx.vitesses.z = trameRx.vitesses.z;
 trameTx.interrupteurs = trameRx.interrupteurs;
 trameTx.val8[0] = 0;   // CPU load
 trameTx.val8[1] = 0;   // Soc temp
 trameTx.val8[2] = 0;   // link
 trameTx.val8[3] = 0;   // RSSI

 for( uint8_t i = 0; i < TXFRAMESIZE; i++)
  PISERIAL.write(trameTx.bytes[i]);
}

void displayTtsBuffer (uint8_t * ttsBuffer, uint8_t bufferSize) {
  // you can modify this function to display text on a screen depending on your hardware...
  for( uint8_t i = 0; i < bufferSize; i++)
    Serial.write(ttsBuffer[i]);
  Serial.println("");
}

void writeTtsBuffer( uint8_t ttsChar) {
  static uint8_t ttsCurseur = 0;
  if( ttsCurseur < TTSBUFFERSIZE && ttsChar != '\0') {
    ttsBuffer[ttsCurseur] = ttsChar;
    ttsCurseur ++;
  }
  if( ttsCurseur == TTSBUFFERSIZE || ttsChar == '\0') {
    displayTtsBuffer (ttsBuffer, ttsCurseur);
    ttsCurseur = 0;
  }
}
Add SCS Library and convert 0 65535 -> -180° à 180° to 0 1023 -> -100° à 100°:
#include <SCServo.h>
SCSCL sc;

int uint16toSCS15( uint16_t value ) {
  return (value - 32768)* 512 * 180 / (100 * 32768) + 512;
}
Configure ID servo with POSITIONS: ( sc.WritePos(IDSERVO, uint16toSCS15(trameRx.positions[0].y), 200);
uint8_t servoId[4] {2, 3 , 4, 5};

void updateServo() {
  for(uint8_t i = 0; i < NBPOSITIONS; i++) {
    for(uint8_t j = 0; j < 2 ; j++) {
      if(oldPositions[i].coordonnees[j] != trameRx.positions[i].coordonnees[j]) {
        sc.WritePos(servoId[i + j], uint16toSCS15(trameRx.positions[i].coordonnees[j]), 200);
        oldPositions[i].coordonnees[j] = trameRx.positions[i].coordonnees[j];
      }
    }
  }
}
And voila!
#100558 Télémétrie pour mon robot d'exploration
Posté par
sur 03 décembre 2018 - 12:08
dans
Electronique
Salut j'ai lu tout ton projet qui est vraiment classe.
Pour la communication, tu pourrais envisager d'utiliser des modules dorji1276.
Cela utilise la liaison série. un sur ton robot et un sur ton pc, serveur, etc...
#99962 Système pan tilt avec servo 9G imprimé en 3D pour camera Pi
Posté par
sur 10 novembre 2018 - 01:19
dans
Bras robots, pinces, tourelles, et autres manipulateurs
Alors j'ai imprimer les fichiers et nickel. Par contre j'ai modifier le corp de la tourelle car tous les servos 9g n'ont pas la sorti des fils sur le côté.
#99983 Système pan tilt avec servo 9G imprimé en 3D pour camera Pi
Posté par
sur 10 novembre 2018 - 08:11
dans
Bras robots, pinces, tourelles, et autres manipulateurs
Ah oui en effet ... Du coup je veux bien que tu mettes ici la version modifiée =) Comme ça ça profitera à tout le monde =)
Ou si tu as fait une modification manuellement sur la pièce après son impression, poste une photo et je ferais la modification sur le fichier =)
Je suis parti la mais à modifier mieux je pense. j'ai modifier qu'un côté pour que tu puisse voir.
Fichier(s) joint(s)
-
 corpstourelle.stl 92,86 Ko
214 téléchargement(s)
corpstourelle.stl 92,86 Ko
214 téléchargement(s)
#99924 Système pan tilt avec servo 9G imprimé en 3D pour camera Pi
Posté par
sur 08 novembre 2018 - 09:07
dans
Bras robots, pinces, tourelles, et autres manipulateurs
Allez hop je fait chauffer l'imprimante demain soir xD
#108739 Précision moteur pas à pas en fraction de pas
Posté par
sur 06 avril 2020 - 09:20
dans
Mécanique
Bonjour, pour le moteur, partir sur un motoreducteur avec un encodeur serait il envisageable?
Il faudrait juste faire une boucle pied pour l'asservissement de l'angle ?
Il faudrait juste faire une boucle pied pour l'asservissement de l'angle ?
#108440 Problème avec un multiplexeur analogique et l'ADC de l'Arduino
Posté par
sur 26 mars 2020 - 03:59
dans
Electronique
Sympa comme projet, tu aurais une vidéo en action avec ton "jeu" ?
#104851 MOORE (Mobile-Open-Omnidirectional-Robot-Experience)
Posté par
sur 23 août 2019 - 10:26
dans
Robots roulants, chars à chenilles et autres machines sur roues
Bonjour,
à mon avis avec les roues omni-wheel cela ne sera pas un 4x4.
son évolution ce limitera sur les sol assez lisse ( du moin il faut oublier le sable etc....)
Bonjour,
je vais suivre le projet.
As-tu pensé aussi mettre une go pro pour filmer ses évolutions dans tous les terrains ( sable , cailloux , terre , lunaire ... )
#99987 Minus V1.0 Un vigibot simplifié pour Noël en précommande ?
Posté par
sur 10 novembre 2018 - 09:01
dans
Archives vigibot
Ça avance doucement mais sûrement 😁.
Ne faite pas attention filament, j'utilise du pteg.
Ne faite pas attention filament, j'utilise du pteg.
Image(s) jointe(s)
#99865 Minus V1.0 Un vigibot simplifié pour Noël en précommande ?
Posté par
sur 06 novembre 2018 - 10:57
dans
Archives vigibot
Mike118, ou trouve t'on la carte de gestion des moteurs, les moteurs, ainsi que le système d'alimentation?
#100233 Minus V1.0 Un vigibot simplifié pour Noël en précommande ?
Posté par
sur 17 novembre 2018 - 09:23
dans
Archives vigibot
@Gamepigeek
La raspberry se met en veille,donc les ports gpio reste à l'état( a confirmer par mike118 ou pascal).
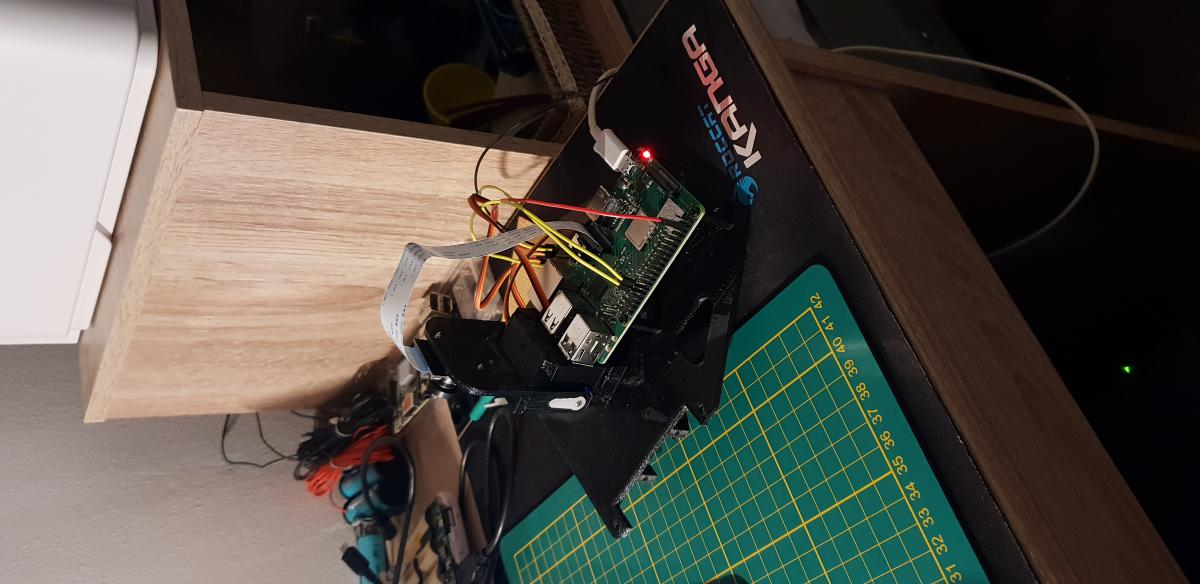
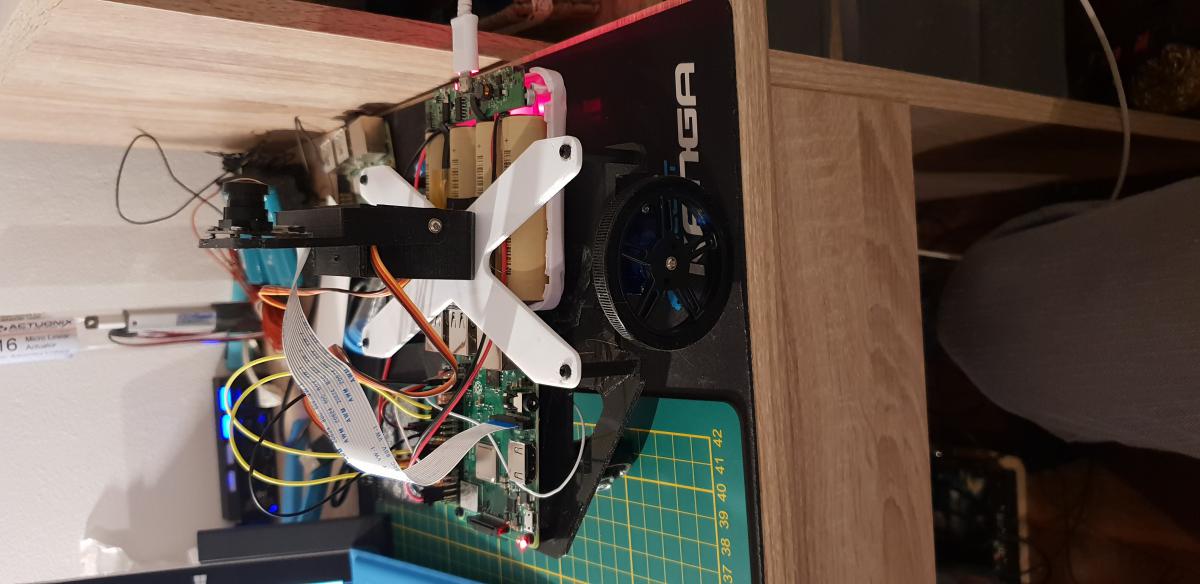
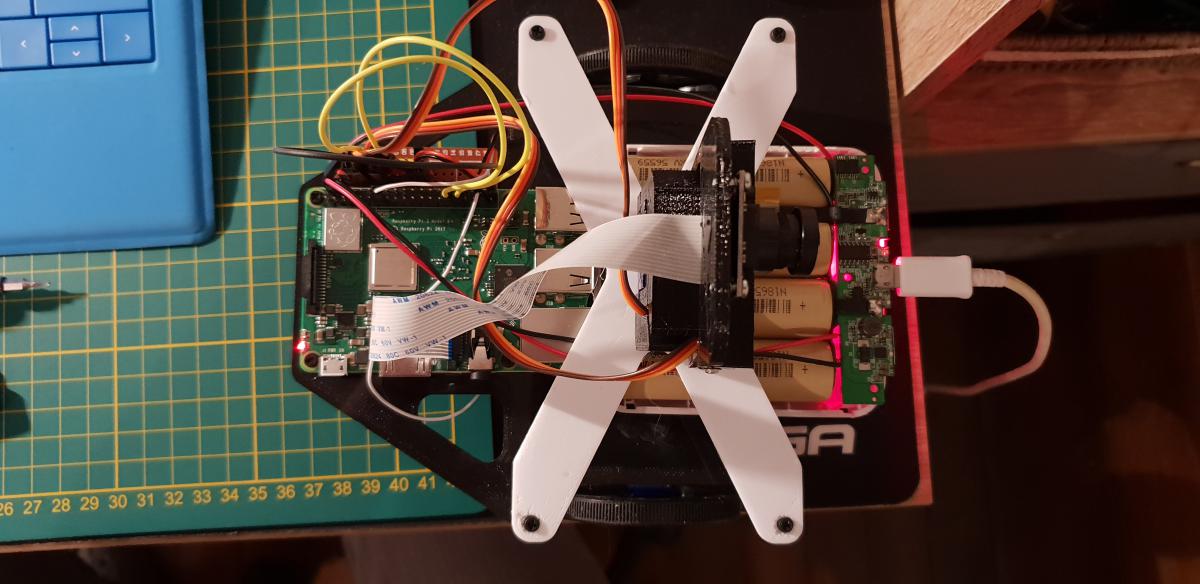
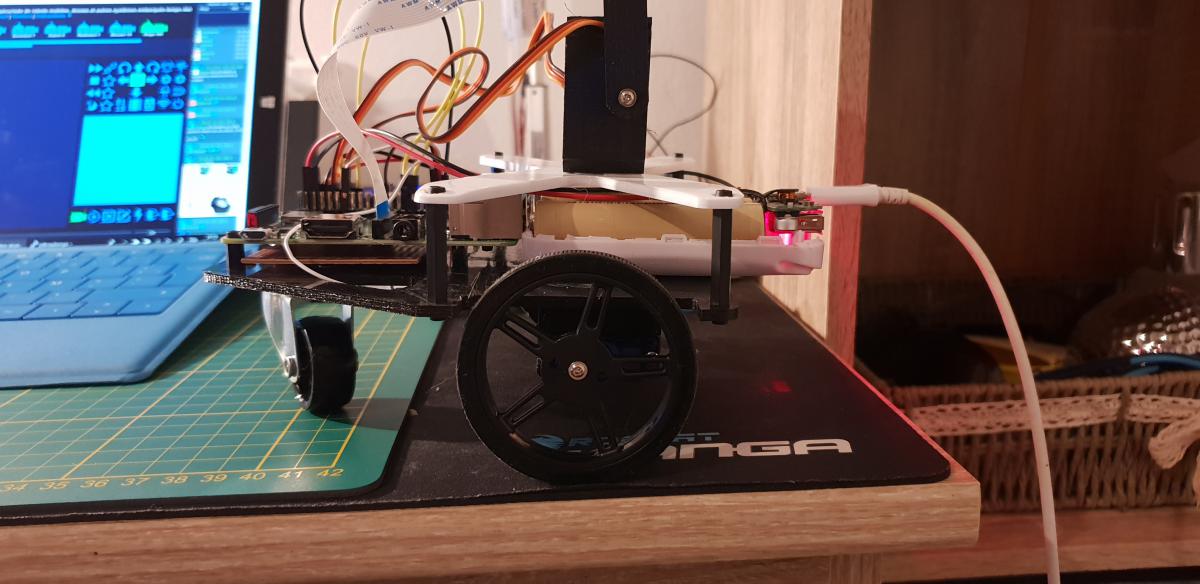
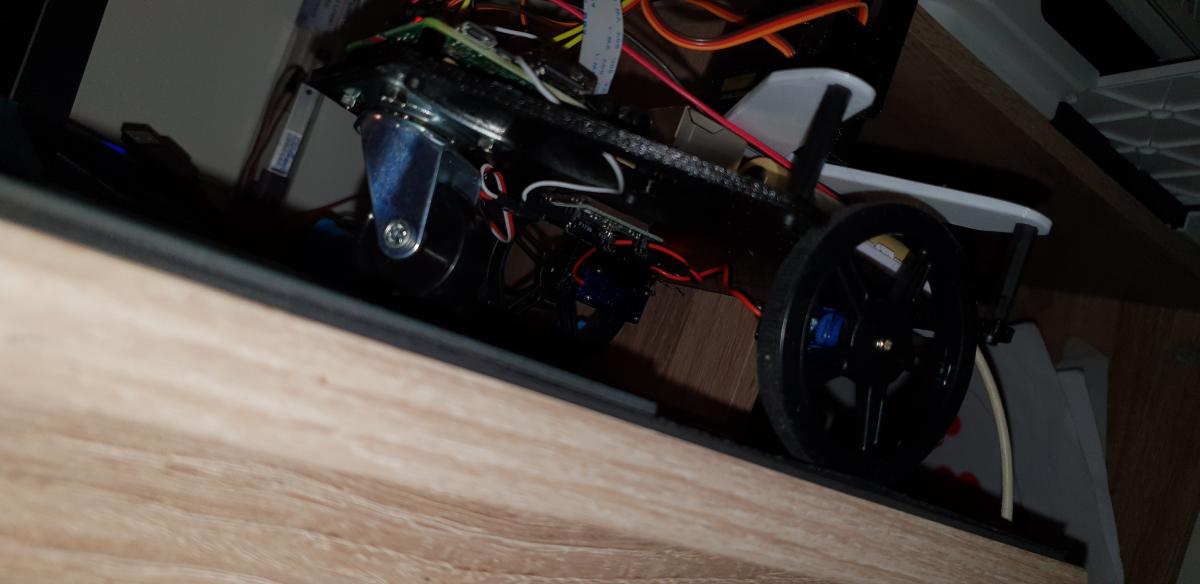
Voici donc mon bot fonctionnel.La powerbank doit être fixer ailleur pour l'équilibre du robot mais cela fonctionne en l'état. Je laisse comme ça en attendant le hat-ups.
La raspberry se met en veille,donc les ports gpio reste à l'état( a confirmer par mike118 ou pascal).
Voici donc mon bot fonctionnel.La powerbank doit être fixer ailleur pour l'équilibre du robot mais cela fonctionne en l'état. Je laisse comme ça en attendant le hat-ups.
Image(s) jointe(s)
#100139 Minus V1.0 Un vigibot simplifié pour Noël en précommande ?
Posté par
sur 14 novembre 2018 - 10:08
dans
Archives vigibot
J'ai monté les moteurs seulement ce soir, ils ne sont pas sur les photos précédente.
#100136 Minus V1.0 Un vigibot simplifié pour Noël en précommande ?
Posté par
sur 14 novembre 2018 - 09:07
dans
Archives vigibot
De memoire 5 et 6 pour la tourelle. Mais tout sera détaillé.
#100090 Minus V1.0 Un vigibot simplifié pour Noël en précommande ?
Posté par
sur 12 novembre 2018 - 08:51
dans
Archives vigibot
Il avance doucement mais sûrement. J'attend la réception de la carte et des moteurs.
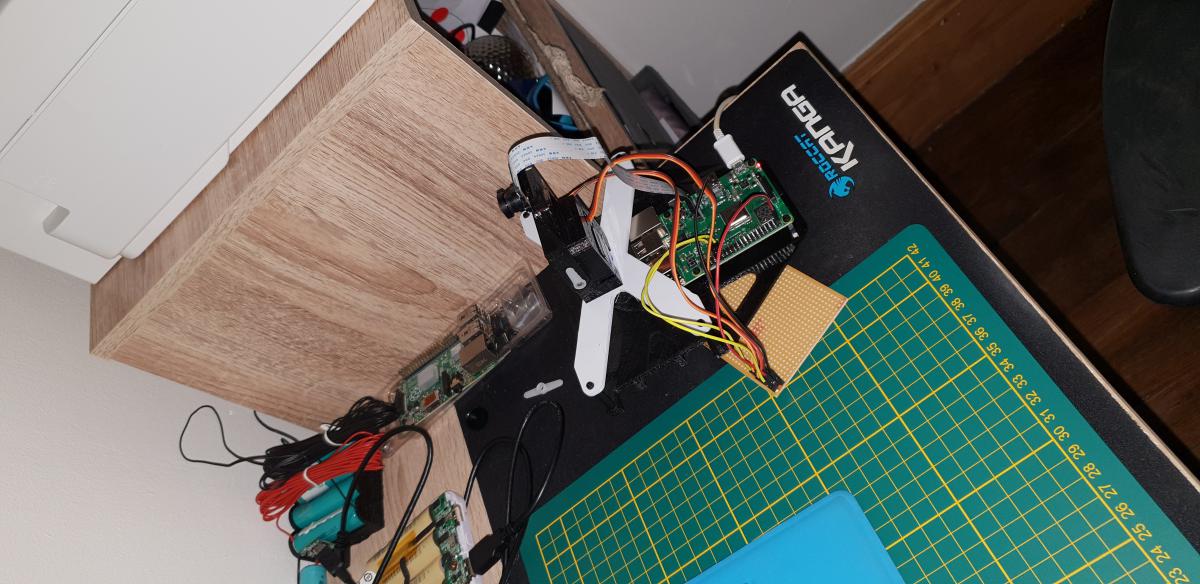
La tourelle fonctionne bien, et avec la connection pas top de chez moi ça reste fluide.
La tourelle fonctionne bien, et avec la connection pas top de chez moi ça reste fluide.
Image(s) jointe(s)
#100156 Minus V1.0 Un vigibot simplifié pour Noël en précommande ?
Posté par
sur 15 novembre 2018 - 08:58
dans
Archives vigibot
je ne peut que te conseiller de regarder ça https://lh3.googleus...hCA_oo7e5mFk29Q .
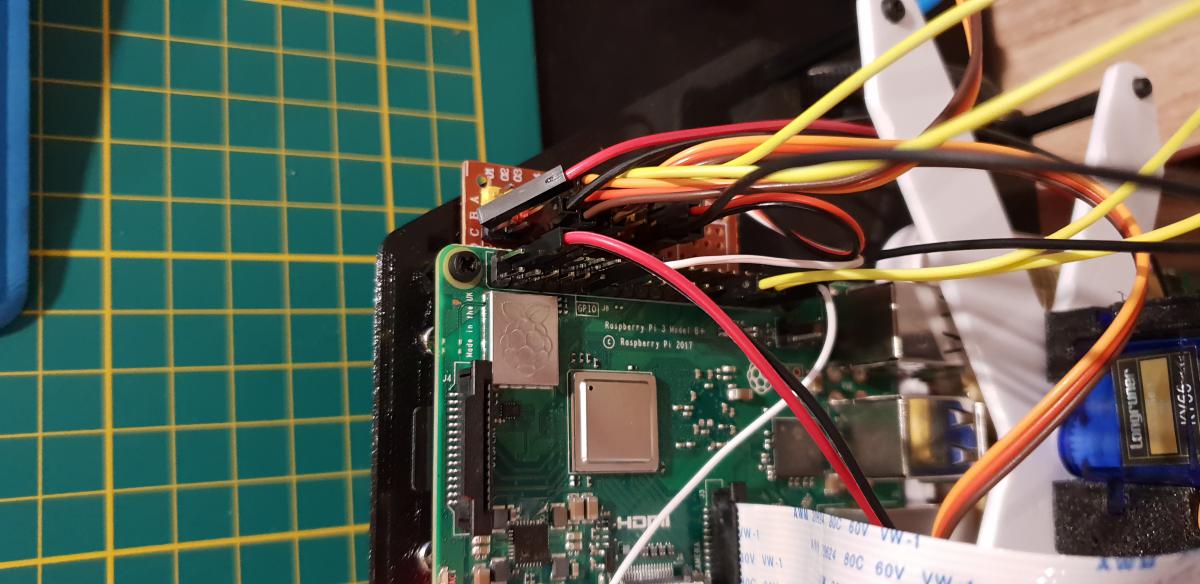
Pour les moteur, pin 26 et 27 de la raspberry pi 3 b+ à ne pas confondre avecle numéro GPIO 
#99874 Minus V1.0 Un vigibot simplifié pour Noël en précommande ?
Posté par
sur 06 novembre 2018 - 05:48
dans
Archives vigibot
C'est pas pressé, mais c'est très bon projet.
Quoique
Quoique
Image(s) jointe(s)

#99827 Minus V1.0 Un vigibot simplifié pour Noël en précommande ?
Posté par
sur 05 novembre 2018 - 04:07
dans
Archives vigibot
Mike118, je ne trouve pas le lien pour dl les stl 🤔
#99839 Minus V1.0 Un vigibot simplifié pour Noël en précommande ?
Posté par
sur 05 novembre 2018 - 09:06
dans
Archives vigibot
J'avais pas vu le lien, désolé.
Bon une autre question après j’arrête:
-Y aura t'il possibilité de rajouter des capteur? du style télémètre laser ou autre pour éviter que les invités qui utilise ces robots la ne les colles dans les murs ou autres.
#100041 Minus V1.0 Un vigibot simplifié pour Noël en précommande ?
Posté par
sur 11 novembre 2018 - 04:55
dans
Archives vigibot
On est en train de rédiger le tuto avec la préparation de la raspberry, le câblage etc.
#100053 Minus V1.0 Un vigibot simplifié pour Noël en précommande ?
Posté par
sur 11 novembre 2018 - 07:37
dans
Archives vigibot
C'est bien une carte pour moteur cc.
Minus n'utilise pas de servo modifiés 360°.
Pour les caractéristique je laisse mike118.
Minus n'utilise pas de servo modifiés 360°.
Pour les caractéristique je laisse mike118.
#100094 Minus V1.0 Un vigibot simplifié pour Noël en précommande ?
Posté par
sur 12 novembre 2018 - 09:33
dans
Archives vigibot
Oui oui c'est le bêta testeur lol
#110775 How to use stepper motor with Arduino & AccelStepper library
Posté par
sur 05 août 2020 - 02:22
dans
Vigibot
Hi,
this is a code for use stepper motor on vigibot using an Arduino and AccelStepper library.
I use a A4988 stepper motor driver., two wire is needed between driver and Arduino ( Step & Dir).
/*
 * Vigibot Pi to Arduino Uart default remote configuration example by Mike118
 */

#include <AccelStepper.h>


// Meta Type :

typedef struct {
 union {
  struct {
   int16_t x;
   int16_t y;
  };
  int16_t coordonnees[2];
  uint8_t bytes[4];
 };
} Point;

typedef struct {
 union {
  struct {
   int8_t x;
   int8_t y;
   int8_t z;
  };
  uint8_t bytes[3];
 };
} Vitesses;


// CONFIG

#define PISERIAL Serial
#define NBPOSITIONS 2
#define FAILSAFE 250 // ms


// TTS

#define TTSBUFFERSIZE 255
uint8_t ttsBuffer[TTSBUFFERSIZE];
uint8_t ttsCurseur = 0;


// TX

#define TXFRAMESIZE (NBPOSITIONS * 4 + 17)

typedef struct {
 union {
  struct {
   uint8_t sync[4];               // 4
   Point positions[NBPOSITIONS];  // NBPOSITIONS * 4
   uint16_t val16[2];             // 2 * 2
   uint8_t choixCameras;          // 1
   Vitesses vitesses;             // 3
   uint8_t interrupteurs;         // 1
   uint8_t val8[4];               // 4
  };

  uint8_t bytes[TXFRAMESIZE];
 };
} TrameTx;


// RX

#define RXFRAMESIZE (NBPOSITIONS * 4 + 9)

typedef struct {
 union {
  struct {                       // Sizes
   uint8_t sync[4];              // 4
   Point positions[NBPOSITIONS]; // NBPOSITIONS * 4
   uint8_t choixCameras;         // 1
   Vitesses vitesses;            // 3
   uint8_t interrupteurs;        // 1
  };

  uint8_t bytes[RXFRAMESIZE];
 };
} TrameRx;


TrameTx trameTx;
TrameRx trameRx;

uint32_t lastTrameTimestamp = millis();

AccelStepper Xaxis(1, 2, 6);
AccelStepper Yaxis(1, 4, 7);

void setup() {
  PISERIAL.begin(115200);
  // add all your init here
  Xaxis.setMaxSpeed(400);
  Yaxis.setMaxSpeed(400);
  Xaxis.setSpeed(0);
  Yaxis.setSpeed(0);
}


void loop() {

  if(readPiSerial()) {
    // each time we receive a full trame run repeatedly:
    // use values inside trameRx to tell your robot how to move ...
    // trameRx.vitesses.x , trameRx.vitesses.y, trameRx.vitesses.z
    // trameRx.positions[i].x trameRx.positions[i].y  etc....

    writePiSerial();
    lastTrameTimestamp = millis();
    updateSteppers();
  }

  if( millis() - lastTrameTimestamp > FAILSAFE ) {
    // Stop the robot in case the robot lost connection with the Pi
    stopSteppers();

  } else {
    // put your main code here, to run repeatedly:
    // avoid abstacle, run speed ...

    runSteppers();
  }
}

bool readPiSerial() {
 uint8_t current;
 static uint8_t lastType = 0;
 static uint8_t n = 0;
 static uint8_t frame[RXFRAMESIZE];

 while(PISERIAL.available()) {
  current = PISERIAL.read();

  switch(n) {

   case 0:
    if(current == '$')
     n = 1;
    break;

   case 1:
    if(current != 'T' && lastType == 'T')
     writeTtsBuffer('\0');

    if(current == 'S' || current == 'T') {
     lastType = current;
     n = 2;
    } else
     n = 0;
    break;

    default:
    frame[n++] = current;

    if(n == RXFRAMESIZE) {

     if(lastType == 'T') {

      for(uint8_t i = 4; i < RXFRAMESIZE; i++) // Do not send the 4 sync data in tts
       writeTtsBuffer(frame[i]);

     } else if(lastType == 'S') {

      for(uint8_t p = 0; p < RXFRAMESIZE; p++)
       trameRx.bytes[p] = frame[p];

     }
     n = 0;
     return true;
    }

  }
 }

 return false;
}

void writePiSerial() {
 // Header, do not modify
 trameTx.sync[0] = '$';
 trameTx.sync[1] = 'R';
 trameTx.sync[2] = ' ';
 trameTx.sync[3] = ' ';

 // modify the feedback according your need. By default we copy the trameRx content ...
 for(uint8_t i = 0; i < NBPOSITIONS; i++) {
  trameTx.positions[i].x = trameRx.positions[i].x;
  trameTx.positions[i].y = trameRx.positions[i].y;
 }
 trameTx.val16[0] = 0;   // Voltage (will be updated by Raspberry pi)
 trameTx.val16[1] = 0;   // Percent (will be updated by Raspberry pi)
 trameTx.choixCameras = trameRx.choixCameras;
 trameTx.vitesses.x = trameRx.vitesses.x;
 trameTx.vitesses.y = trameRx.vitesses.y;
 trameTx.vitesses.z = trameRx.vitesses.z;
 trameTx.interrupteurs = trameRx.interrupteurs;
 trameTx.val8[0] = 0;   // CPU load (will be updated by Raspberry pi)
 trameTx.val8[1] = 0;   // Soc temp (will be updated by Raspberry pi)
 trameTx.val8[2] = 0;   // link (will be updated by Raspberry pi)
 trameTx.val8[3] = 0;   // RSSI (will be updated by Raspberry pi)

 for( uint8_t i = 0; i < TXFRAMESIZE; i++)
  PISERIAL.write(trameTx.bytes[i]);
}

void displayTtsBuffer (uint8_t * ttsBuffer, uint8_t bufferSize) {
  // you can modify this function to display text on a screen depending on your hardware...
  for( uint8_t i = 0; i < bufferSize; i++)
    Serial.write(ttsBuffer[i]);
  Serial.println("");
}

void writeTtsBuffer( uint8_t ttsChar) {
  static uint8_t ttsCurseur = 0;
  if( ttsCurseur < TTSBUFFERSIZE && ttsChar != '\0') {
    ttsBuffer[ttsCurseur] = ttsChar;
    ttsCurseur ++;
  }
  if( ttsCurseur == TTSBUFFERSIZE || ttsChar == '\0') {
    displayTtsBuffer (ttsBuffer, ttsCurseur);
    ttsCurseur = 0;
  }
}


void stopSteppers() {
  Xaxis.setSpeed(0);
  Yaxis.setSpeed(0);
  runSteppers();
}

void runSteppers() {
  Xaxis.runSpeed();
  Yaxis.runSpeed();
}


void updateSteppers() {
  Xaxis.setSpeed(trameTx.positions[0].x);
  Yaxis.setSpeed(trameTx.positions[0].y);
}
#108358 Driver convertisseur de moteurs CC en servomoteurs
Posté par
sur 24 mars 2020 - 09:10
dans
Vigibot
Bonjour, pour les réglages du robot, elle sont hébergés côté serveur.
Cela veut dire que si tu refais une image et que tu remets le nom et le mdp de ton robot il reprendra la configuration que tu avais mise.
Cela veut dire que si tu refais une image et que tu remets le nom et le mdp de ton robot il reprendra la configuration que tu avais mise.
#99779 Comment créer mon robot vigibot " Minus like " ?
Posté par
sur 04 novembre 2018 - 12:02
dans
Archives vigibot
Allez, je me plante ici avec ma tente et j'attend 


