EN :
A little post to present how Madmike88252 ( from switzerland ) hacked a nice toy to include a raspberry pi and a pi camera and make a robot controlled over the interned with vigibot.com
FR :
Un petit message pour présenter comment Madmike88252 ( qui est suisse ) a modifié un jouet sympathique pour inclure une raspberry pi et une camera pi pour faire un robot contrôlé par internet avec Vigibot.com
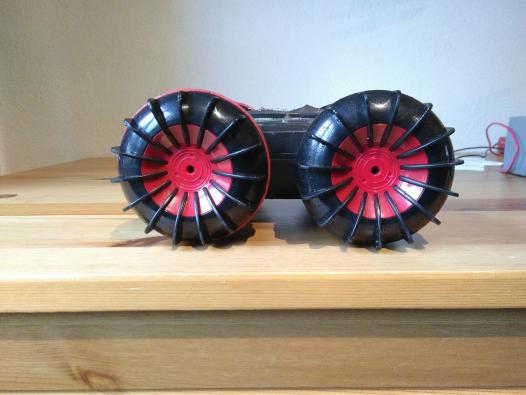
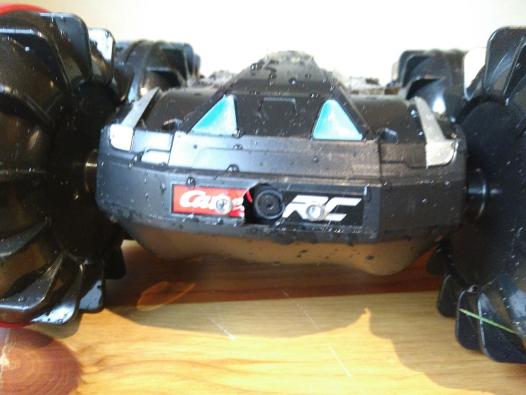
Here are some pictures of his robot called Terrainer: / Voici quelques images de son robot appelé Terrainer
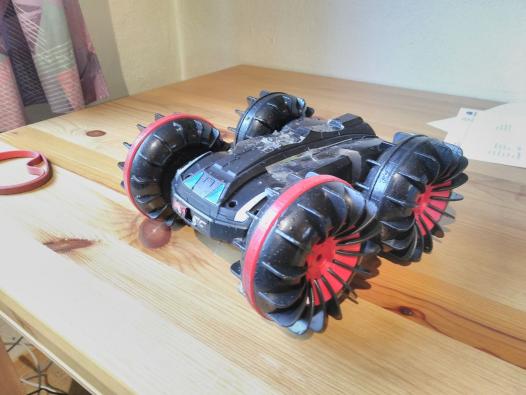
Side view / Vue de côté
The integrated camera ( A wide angle would have provide a better view... But harder to fit in )
La caméra intégrée ( Une caméra grand angle aurait apporté une meilleur vue ... Mais plus difficile à intégrer ... )
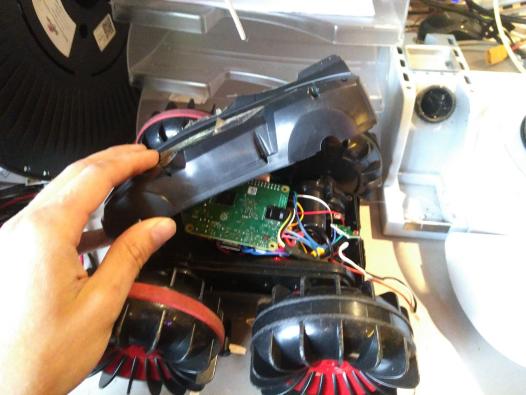
The inside / L'intérieur
The robot try to fly / le robot essaye de s'envoler :
And when the robot is online and open it can be controlled here :
Quand le robot est en ligne et ouvert il peut être controllé ici :
link to go to the page / Lien direct pour aller sur la page
The interresting thing of this particular toy is that the robot is reversible. We made a configuration on this robot allowing to reverse the camera and the controls in order to ease the drive when the robot is reversed !
La partie intéressante de ce jouet en particulier est que le robot peut se retourner. Nous avons même mis une configuration spéciale sur ce robot permettant de retourner la camera et les contrôles pour faciliter le pilotage lorsque le robot est retourné !
Example of list material to make this kind of hack:
An electric toy including the motors a battery and a On Off switch. ( No link provided ... Any toy would work but if too small you may have a hard time to integrate the camera and the raspberry pi... ( Go here if you want make a very small robot without integrated camera and raspberry pi)
A raspberry pi 3A+ ( other raspberry pi would work but 3A+ have the best performance / size ratio, pi zero works with vigibot but some lags may appears ... )
A DC DC 5V convertor ( toys have generally battery > 6V and < 18V ... ) check the battery specifications you have to choose a 5V dc dc convertor that will work for you.
DC DC motor drivers :
Easy to use DC DC motor driver ( no soldering required )
Bigger easy to use DC DC Motor driver ( no soldering required )
Smaller DC DC motor driver (needing soldering )
Wires
female female wire to connect the PI and the motor driver ( choose the lenght you need 10 cm can be enough ... )
Red and black wires to connect the batterie the switch, the DC DC converter motor drivers and motors.
A raspberry pi camera
Wide angle raspberry pi camera
Small camera (but you will not have a wide view with it ... The best is to choose a wide angle camera )
Ribbon cable to connect the raspberry pi to the camera ( Camera are provided with 15cm by default, choose the size you need with the link only if you need more than that!)
how to add my robot on vigibot
how to configure "hardware configuration " on vigibot to use standard dc motor drivers on my robot. :
Type : Choose PwmDirDir for motor drivers requiring 3 wires : PWM IN1 and IN2 like TB6612FNG and L298
Choose PWMDir for motor driver requiring 2 wires : Pwm + direction like MD10C board
Choose PwmPwm for motor drivers requiring only 2 wires : IN1 and IN2 like L9110 ( or others with PWM set to 100% ... )
Choose Servos for motor drivers requiring only 1 wires with servomotor signal ( 360° servo or FT2CH board )
Add as many gpios as needed in the gpios tab and write the raspberry GPIO number connected to the motor driver.
Add as many sleepmode as many gpios you have ( you can set nose , Floating, High or Low state. The gpios will be set to this states when the robot sleep
If using a motor driver using pwm 0 100% change the outs to -100 -1 1 100 ( do this for any type starting with " Pwm " )
You will be able to later customize the -1 1 value according your motors .